AI Chat Interface
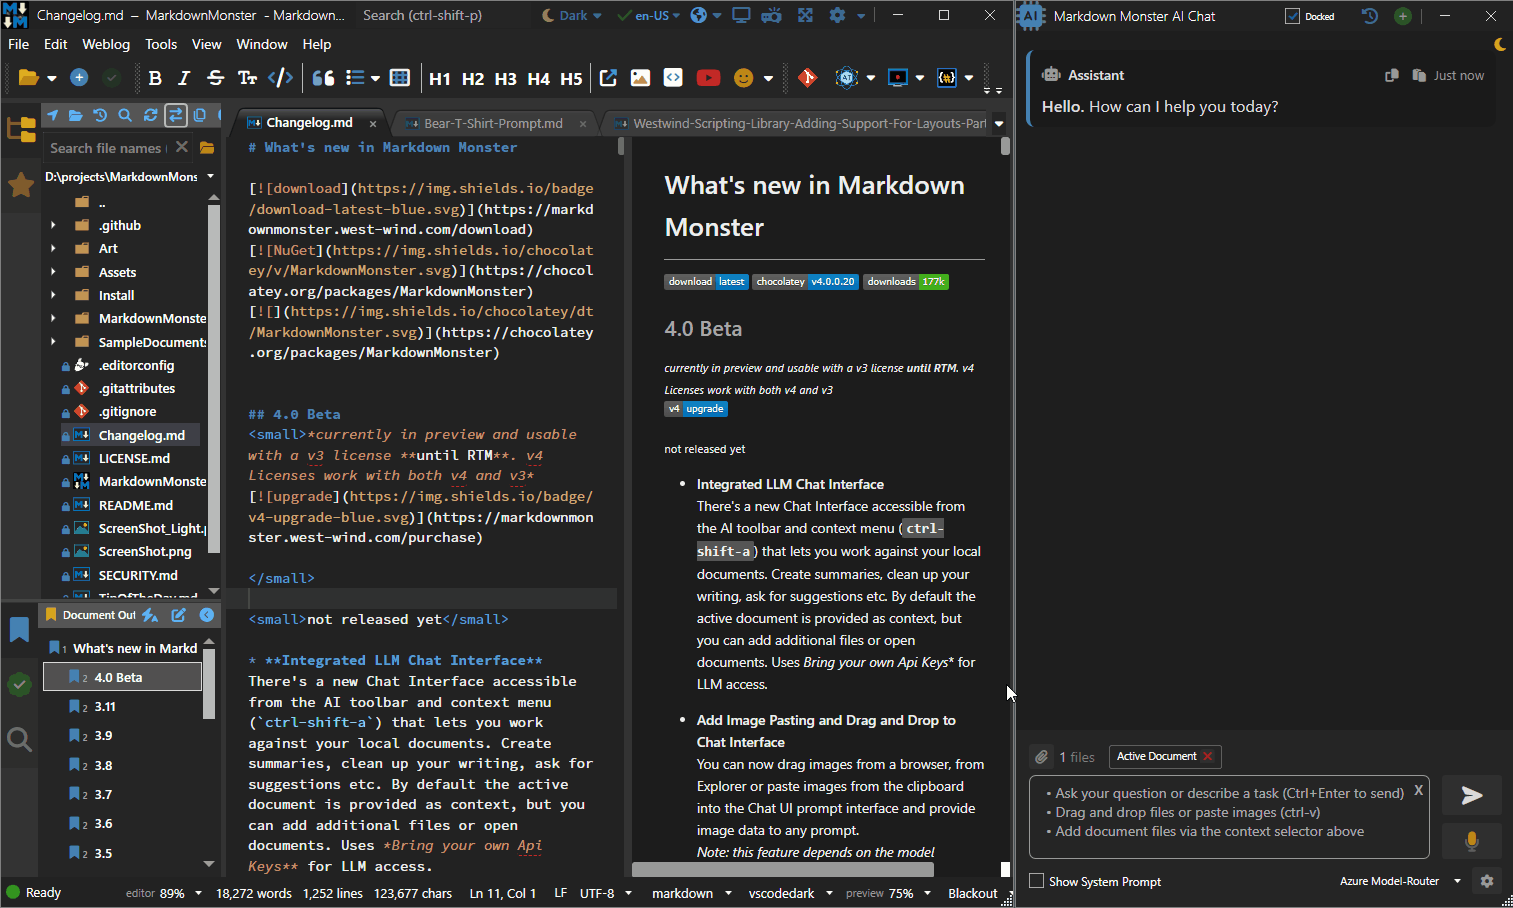
Markdown Monster's AI Chat integration allows you to query your open documents and capture the results as Markdown that you can optionally paste into the document.
The chat interface can be very helpful for summarizing one or more documents, finding specifics about a topic, analyzing images (assuming the model chose is multi-modal) and provide general AI type operation.
The chat interface works through models that you provide (Bring your own Model) using your own API keys or free local engines. There are many options available from low cost to free to top-tier expensive models. If you're just getting started I'd recommend getting an OpenRouter.ai account that lets you easily work with a huge variety of models from big name vendors and free open source models through a single account. MM provide a simple Model Configuration Interface you can use to set up one or more different models to use, and you can easily switch between them depending on the type of work and complexity required of your work.
Features
The chat interface should be fairly familiar if you've used any LLM Chat interface like Chat GPT, Claude or Gemini before. While not as sophisticated as these full blown applications, Markdown Monster provides the built-in chat interface to provide easy context to the content you are working on and the ability to capture and paste results into your Markdown content.
Here are some of the features of the Chat Interface
- Ability to query information about provided content or whatever general information that is available in your chosen model.
- Chat history over multiple queries
- Drag or paste images and other common documents like PDFs
(assumes the model you choose support multi-modal input) - Add documents directly from Explorer
- Drag & drop or manually pick files
- Quickly switch between models
(using your own API keys (BYOM - bring your own model)) - Voice support
- Copy/embed result as Markdown
- Save and re-load your Chat History
Chat Operation
By default a new Chat starts with the Active Document context selected so the current document is passed as context to the Chat request so you can reference that document. You can also add the Selected Text and Open Documents or explicitly select files from the file system to add to the request:
- Click on the button to add:
- Active Document
- Current Selection
- All open Documents
- Select Files...
- Drag & Drop text and document files into the file area
- Drag & Drop and Paste Images into the Prompt input box
The chat maintains active history of requests so your previous input in the same chat stays in context, until you start a new chat via the button at the top of the form.
As Context items are added to the Chat history, they are removed from the context list above the prompt. You can then add additional files or use a different active document or text selection which is then added to the chat history.
Note that once items have been sent and added to the chat history, they cannot be removed. Each request re-sends the entire current chat history, so the longer a chat goes on, the bigger the context gets. The resulting token count is shown for each request showing both the input and output tokens for each request.
When you need to start a new chat topic make sure to create a new Chat rather than continuing on with an existing chat, to avoid the extra context and potential associated cost. To create a new Chat use the button at the top of the form.
Voice Operation
For Chat prompting voice operation can be very efficient to quickly provide complex inputs. Voice activation is explicit and to activate voice mode use the button to start recording your prompt.
When done make sure the text has completely captured your voice input into the Prompt textbox, before clicking the button. Clicking the button, or typing any text into the text box stops voice recording.
Voice Configuration
Voice Input works through the Windows Voice Typing feature which by default works through the key and shows a Voice Typing Widget. Markdown Monster automates operation of this interface directly for easier activation and deactivation through MM's user interface (but you can actually use directly if you choose).
Voice input in Markdown Monster is enabled by default via the Enable Voice Dictation setting found in the Settings.
In addition, Windows also has to be enabled to use Windows 11 Voice Typing feature . However, in recent updates of Windows 11, Voice Typing is now on by default and if the feature is configured and working, you'll see a recording widget when you press . Otherwise, you are prompted to set up the Voice Typing feature.
If Windows does not have Voice Typing enabled, due to explicit disabling, or no Microphone inputs, clicking on the button in the Chat UI shows the recording icon, but it may not actually work. Make sure when you click the button the Microphone Widget activates and if it doesn't use to configure your microphone setup first then retry.
Comment or report problem with topic