 Local Jekyll Publishing
Jekyll is a static Web Site generation engine that has support for blogs via a specific directory structure. It uses a Build server to generate the static site layout and Git to 'publish' the site to a Jekyll enabled hosting site.
Markdown Monster supports Jekyll via 'local' publishing, which means that you can create a Weblog post in Markdown Monster using New Weblog Post and then 'publish' the post into your Jekyll Project's directory structure. MM also optionally can build and launch your Jekyll site, but it will not automatically 'push' to Git - that's left for you to do when you are ready to do your final deploy.
In-Place Jekyll Editing
What's described here as 'publishing' has a number of benefits, but it's optional. If you prefer to maintain Jekyll posts directly in-place in the Jekyll folders, MM can handle that too.
To make the in-place experience better for displaying images, it helps to create an empty
.markdownmonsterfile in your Jekyll Project root. This helps resolve image paths like/assets/postid-image1.pngand properly display images see more info for Site Relative Root Path Mapping
The Markdown Monster Local Jekyll Publishing process performs the following tasks:
- Copies the Markdown File to the Jekyll
_postsfolder - Fixes up the YAML header for Jekyll's format
- Copies any local relative Images into the Jekyll
assetsfolder - The
assetsfolder has the same slug name as the post - Fixes up the image in the Markdown for the
assetsfolder location - Sets a featured image using the
featuredImageYAML tag - Optionally launches the Jekyll build server
- Optionally opens a browser on the new post
A few important things to keep in mind with this 'publishing' process:
- The editable posts are not stored in the Jekyll
_postsfolder - The editable posts are separately stored in the MM Weblog folder structure (or whereever you choose)
- Posts are 'published' into the Jekyll
_postsfolder
Once published you can choose whether to:
- Continue using the Markdown Monster Content File for the source of truth
- Use the new Post in the Jekyll
_postsfolder as the source of truth
Using the former you can repeat the process described above: Edit and make changes, save, and then re-publish to Jekyll and push.
The latter lets you make the changes directly to the generated Markdown file in the Jekyll _posts folder, but requires that from then on you manually manage any new images and other resources in the scattered Jekyll folders.
Either way works, but - be consistent, so all your editable posts end up in the same place.
Setting up the Jekyll Publishing Configuration
Before you can publish to Jekyll, you need to set up a Publish configuration for the site. To do this go to Weblog->Configure Weblogs and create a new entry:
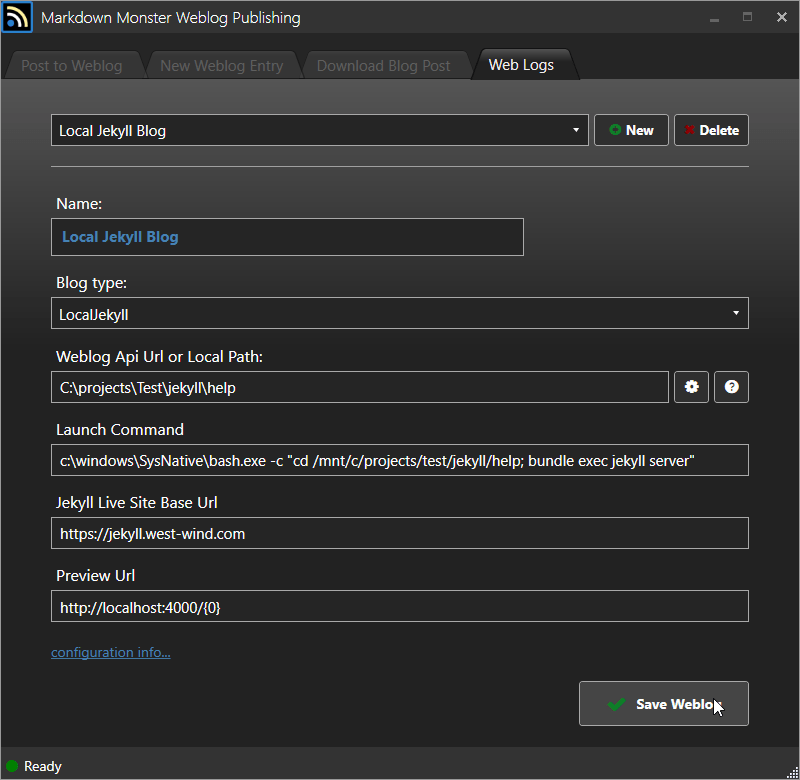
Set the blog type to LocalJekyll and at minimum you need to provide a Local Path to where your static Jekyll Project lives. This path can point at:
- A Windows Path like
c:\projects\jekyll\testsite - A WSL Path like:
\\wsl$\Ubuntu\home\projects\projects\testsite
You can also provide an optional Launch Command to build and run the Jekyll blog and and optional Preview URL where {0} is be the post slug to be injected. The Jekyll Live Site Base Url provides a base URL to the live Web site that can optionally be used to fix up meta-data links like the featured image url. These latter settings are all optional.
Note that I'm using Windows Sub-System for Linux (WSL) for my Jekyll build as I have Jekyll installed in the Linux sub system. The command line used is:
c:\windows\SysNative\bash.exe -c "cd /mnt/c/projects/Jekyll/MyProject; bundle exec jekyll server"
Note: If you use Bash.exe make sure to use
c:\windows\SysNative\bash.exenot justbash.exeas the latter will fail. MM is a 32 bit application andbash.exeandwsl.exeare not in the 32 bit Environment path as it is for 64 bit applications.
This depends on where your Jekyll folder is stored and whether you're using WSL or raw Windows to run Jekyll. If you use WSL you'll want to use the above bash syntax as WSL with preset commands is a pain.
Creating a new Blog Post
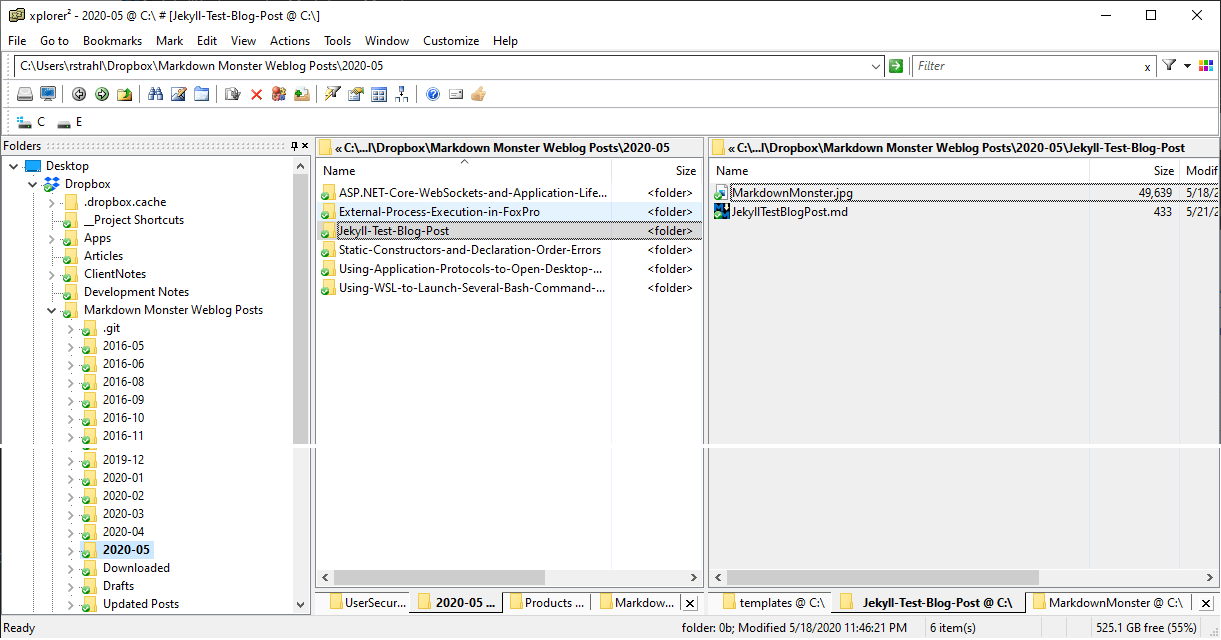
A Weblog post is nothing more than a Markdown document, but you should probably use the WebLog->New WebLog Post menu option to create a new post which adds a basic YAML header, names your file on disk based on the title and puts the post into its own folder where you can store all related content like images. MM by default uses a month based folder breakout with individual folders for each post. Each post folder contains the Markdown Weblog post and any related assets - images mostly. Images are then referenced as relatively linked files.
The base Weblog Posts folder configurable in the configuration as postsFolder and it defaults to DropBox, OneDrive and My Documents in that order - unless you override the value. This folder plays well as a Git repository. Here's what this looks like after a few years of publishing:
Alright! You're ready to start getting busy writing you blog post content.
Publish your Weblog Post
Once you're done writing you need to publish your post. With local Jekyll, 'publishing' is a loose term as the publish process primarily consists of copying files into the specific Jekyll folders and fixing up the YAML to comply with Jekyll's FrontMatter format.
Go to Weblog->Post to Weblog or the icon in the toolbar:
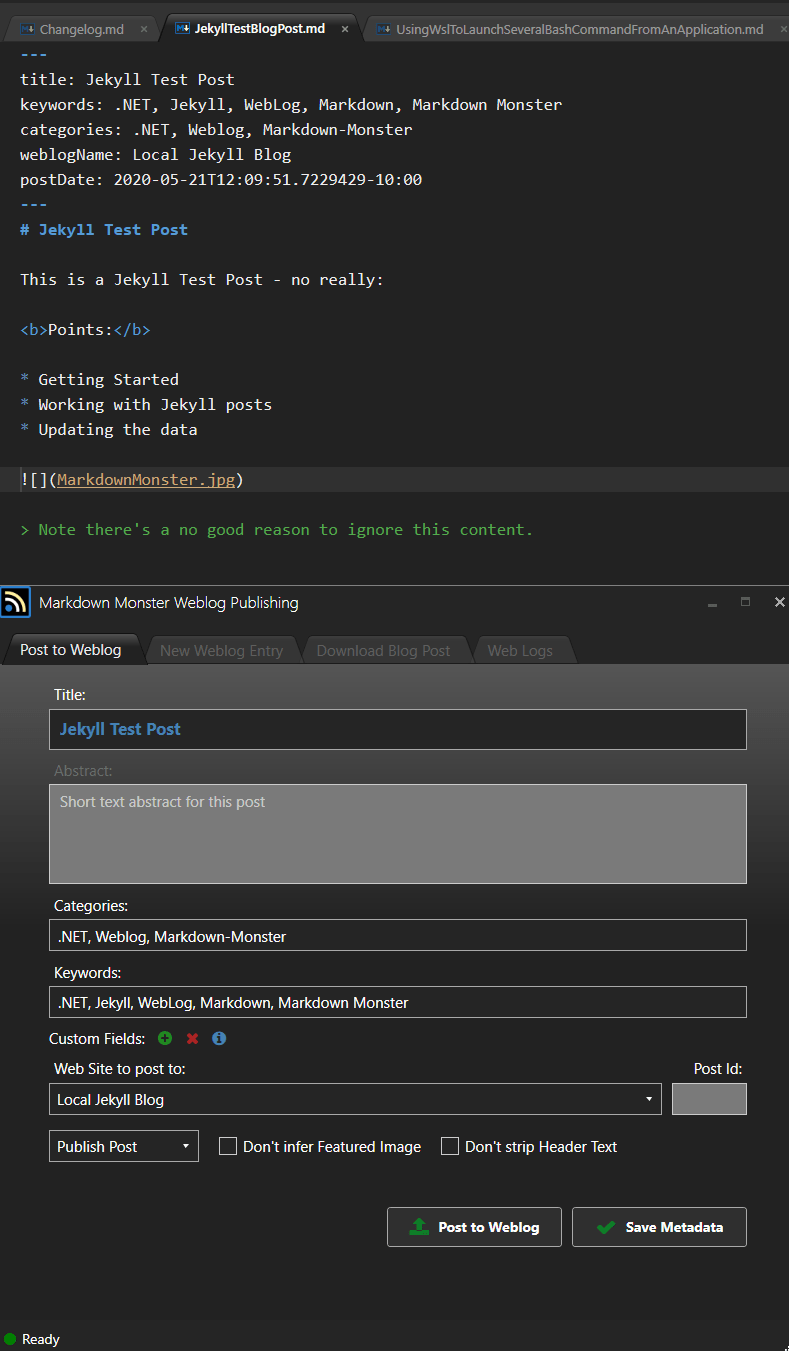
Make sure that the Web Site to post to is set to the new site you configured in the previous section. You can specify categories and keywords. Separate them with commas and use dashes instead of spaces for multi-word keywords or categories.
Note: Jekyll breaks categories into sub folders in the post URL, so try to keep the category list short.
You can click on Save Metadata to save the Metadata into the document which produces the YAML text you can see at the top of the screen shot. MM's YAML is different from Jekyll's but the publish process fixes it up to Jekyll's format.
Finally go press Post to Weblog which goes off and does the copy and fixups. This should be relatively quick as this process is only copying a few files and updating the document.
The output produced by the publish process is summed up in the following screen shot:
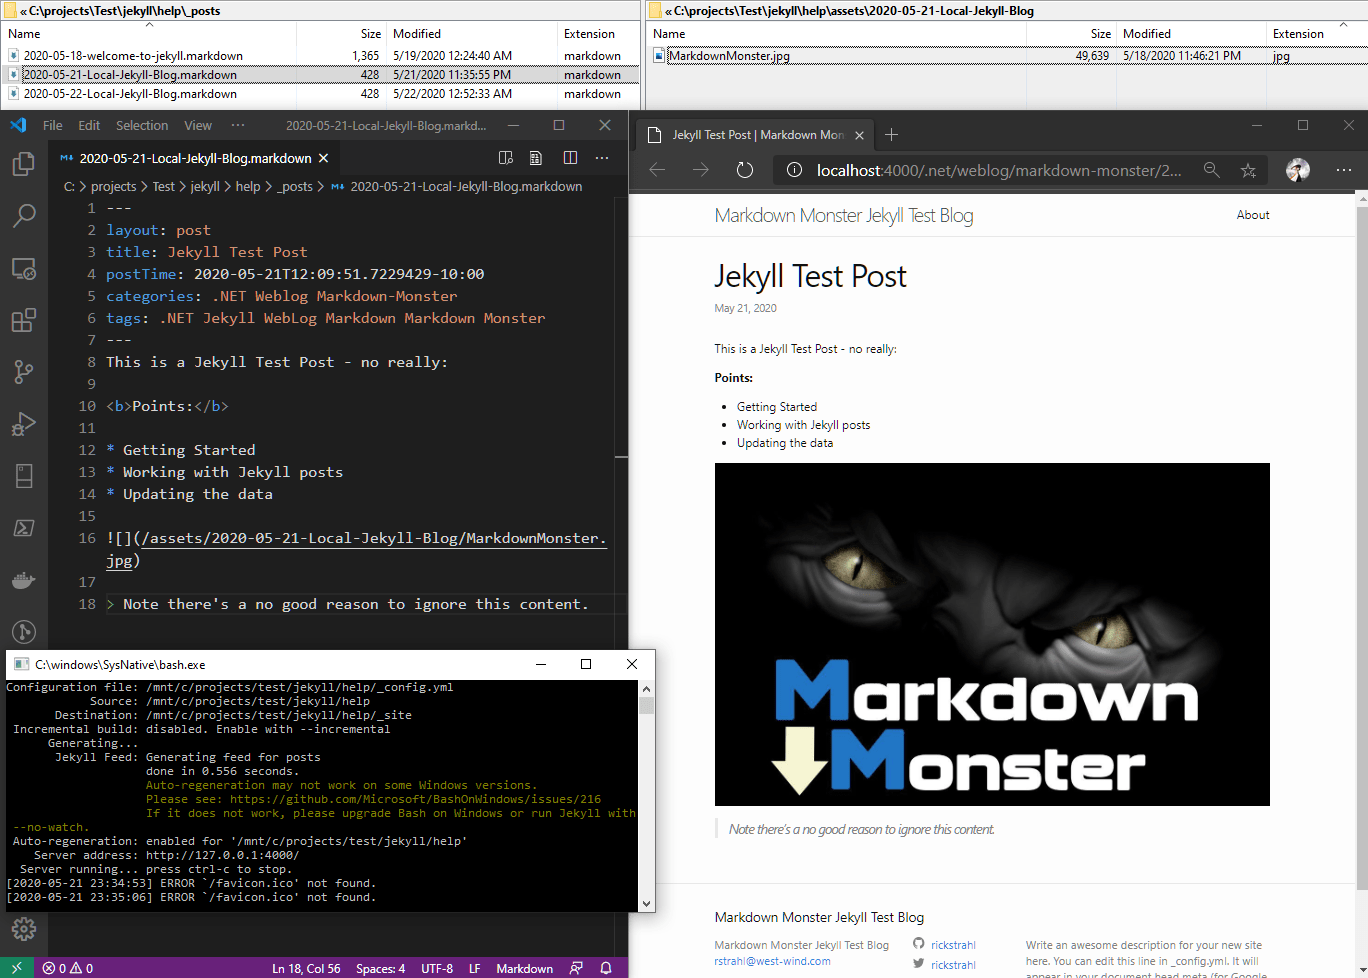
You can see the Markdown document in the _posts folder, the image(s) in the assets folder, the fixed up YAML header in the generated document (and the stripped title) and the Jekyll server started in the WSL Bash console window.
Do you need this?
A number of requests have come in over the years for Jekyll Support, and we've often pushed back with: "Is this really necessary?" After all Jekyll is a static blog - just write your Markdown in place and create your image folders and then you don't need anything else.
While that's certainly possible, there's quite a bit of extra overhead in that process. You have to manually name each post using Jekyll's preferred naming pattern, images require that you create a new image folder separately and that you navigate to this folder each time you need to save an image. While you can use MM for editing of the in-place .markdown file and embedding images the same as always, using the publishing process above improves on the 'manual' process in a number of ways:
Automates Post Creation
The post is created with a properly formatted file name and the appropriate YAML header is automatically created. It literally takes a few seconds to create a new Post and assuming you have the blog configured another few seconds to publish without having to give any thought to file locations. Just Write and Publish!Dependent Image Resources are local
MM Weblog posts are stored as a single folder or folder hierarchy with all files for a post contained within that single folder structure. This is much easier to work with while writing, easier to navigate if you need to find related resources later, easier to backup and easier for consumers of a Git Repository to find related content. And as a bonus content can be directly served out of a Git repository as is.Re-publish
If you need to make changes it's very easy to republish from MM. Simply make editing changes as well as adding or removing related resources and re-publish and MM takes care of republishing the files cleanly.Single Source - Multiple Publishing Targets
MM isn't specific to any blog engine or even a specific storage format! A post is just a Markdown file plus some images in a folder. You can easily re-publish your existing post to WordPress or Medium etc. Or just push directly into Git where Markdown and related images just work as is. If you publish to multiple blogs on different providers the process is always the same.Separate your Content from your Build
Jekyll is basically a build system and it works well for that. But as a content storage and management system frankly it's not great with its scattered folder structure. So if you treat your posts as content that is separate from the build/publish system, you can publish the files where they need to go while maintaining a simple post management structure for editing and maintaining your content.
As somebody who written and published nearly 2000 blog posts over the years, I can tell you that one thing is for certain: Change. It's unlikely whatever engine you're using now will be the same one you use in a few years. For this reason alone I think it's a good idea to keep your content separate from your publishing mechanism or at minimum have an easy way to pull the content back out.
By storing raw Markdown and related resources in a simple folder structure you ensure that the content can be easily reused either for another supported publishing platform or even if you build your own from scratch.

Comment or report problem with topic